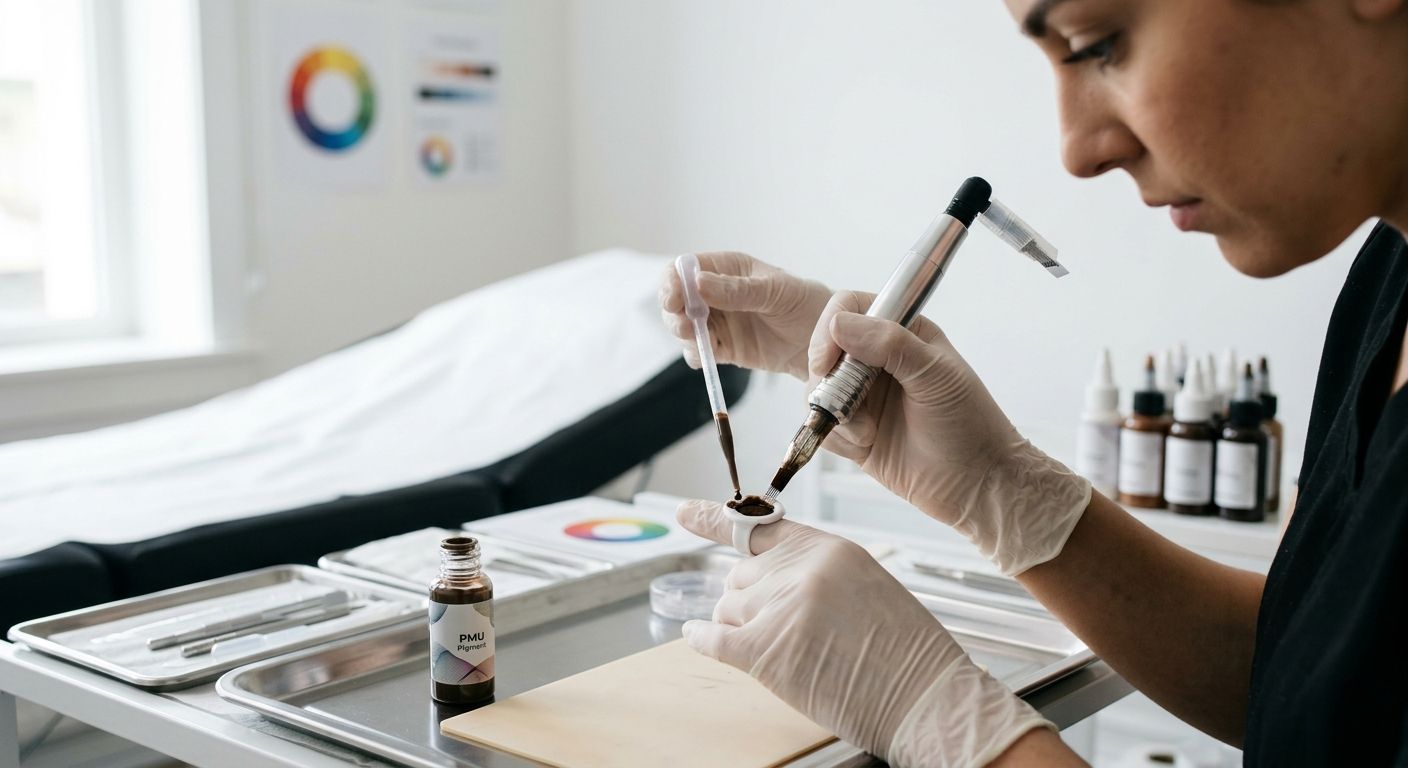
Instead of handling a PMU pigment bottle each time a microblading blade needs pigment, set up a labeled, single-client pigment cup before the procedure. A manual microblading tool does not connect to a pigment bottle: the blade is dipped into dispensed pigment, while the bottle stays out of the working field. INTENZE PMU pigments are an option for professional artists and studios that want to evaluate pigment alongside their tool workflow; check the selected pigment’s label and instructions before use. Distributors can start with the INTENZE product catalog when assessing what to stock.
- The pmu pigments microblading tool workflow uses a pigment cup; a manual blade does not attach to a bottle.
- INTENZE sells PMU pigments for professional artists and studios; confirm the chosen pigment’s instructions before stocking it.
- Keep stock bottles separate from used tools and use a fresh setup for each client.
- Manual microblading and machine PMU require different tool checks; do not treat their pigment-handling steps as interchangeable.
Why this matters
The word connect suggests a cartridge, tube, or software pairing. None describes how a manual microblading blade receives pigment. The practical connection is a controlled transfer: dispense pigment from its bottle into a suitable cup, then use the prepared tool according to its manufacturer’s instructions and your training. Do not place a used blade, glove, or cup against the stock bottle.
For a distributor, this distinction affects more than an artist’s instructions. A studio ordering PMU pigments also needs to know which handling supplies, tool types, and manufacturer directions apply to its workflow. Stocking a pigment without checking its intended use and documentation leaves the artist to resolve those questions at the workstation. In 2026, make that verification part of the purchasing decision, not a last-minute procedural guess.
Before you start
- Confirm the pigment’s intended use. Have the selected PMU pigment’s current label and manufacturer instructions available. Check any directions on preparation, handling, storage, and compatibility that apply to that specific product. INTENZE sells professional tattoo ink and PMU pigments, but those categories are not interchangeable merely because they share a brand.
- Identify the actual tool. Have the manual handle and sterile, appropriate blade specified for the procedure, or the machine and compatible cartridge if this is machine PMU. Follow the tool manufacturer’s assembly and handling instructions. A manual blade does not accept a pigment bottle or machine cartridge.
- Prepare a client-specific workstation. Have suitable disposable pigment cups, required barriers, and a documented cleaning and waste process ready under your applicable rules and training. The easily missed step is checking the pigment instructions before dispensing: once pigment enters a working cup, it is not stock-bottle inventory to return or share with another client.
This is a pigment-handling workflow, not instruction in skin depth, blade angle, anesthetic use, or treatment eligibility. Those decisions require appropriate professional training, the applicable rules where you work, and the specific tool’s instructions.
Configure the pigment station
The first configuration unit is the station, not the handle. Keep the source bottle in a clean handling area and make the working cup the point of access for the tool. That separation gives you a clear boundary between inventory you retain and pigment exposed during a procedure.
- Read the selected pigment’s instructions. Identify any product-specific handling directions before opening it. Do not substitute a general tattoo-ink routine for a PMU pigment’s own directions.
- Check the bottle and record its identity. Verify that its label identifies the pigment you selected and that its packaging is suitable for use under the manufacturer’s directions. Record the identifying information required by your studio procedure and applicable rules; do not rely on cup color to identify a pigment later.
- Set out a suitable disposable cup. Place it in the prepared working area using your established barrier and aseptic procedures. Keep unused cups protected until needed.
- Dispense according to the pigment instructions. Transfer what the procedure calls for without touching the bottle opening to the cup, the tool, or used gloves. Do not pour leftover working-cup pigment back into the bottle.
Expected result: the pigment is identified, the working portion is in its own cup, and the stock bottle has not contacted the tool or used setup. If that separation fails, stop and follow your contamination procedure rather than treating the remaining bottle contents as unquestionably clean.
For a multi-artist studio, repeatable identification matters more than remembering which bottle someone picked up. In 2026, a distributor evaluating a PMU line should ask whether its product documentation gives studios the information they need to select, identify, and handle each pigment. Do not infer sterility, regional compliance, or suitability for a procedure from a brand name alone; verify claims for the exact product.
Set up the manual microblading tool
A manual microblading tool holds a blade; it does not draw pigment from a bottle. Assemble the handle and blade exactly as their manufacturers direct, with the workstation and working cup already prepared. Do not improvise a fitting or transfer method to make a pigment container attach to a manual handle.
- Confirm the handle and blade match. Use the tool maker’s stated compatibility and assembly method. A blade that cannot be secured as directed is not ready for use.
- Prepare the blade under your established procedure. Follow the manufacturer’s directions for its packaging, installation, and single-client use where applicable. Keep the exposed working end away from the stock pigment bottle.
- Use the dispensed pigment as the working source. Access the pigment cup according to your training and the product and tool instructions. Keep the source bottle out of this contact path.
- Pause if any instruction conflicts. If the pigment’s directions, the tool’s directions, or local requirements do not support the planned setup, resolve the conflict before treatment. Do not assume that a method used with tattoo ink also applies to PMU pigment.
Expected result: the blade is secured as instructed, the working pigment is in a separate cup, and no part of the used tool contacts retained stock. This is the complete physical connection for a manual PMU pigments microblading tool workflow; there is no button, setting, or direct bottle coupling to configure.
Use a machine PMU tool instead
Machine PMU is an adjacent workflow, not a different way to connect a bottle to a manual blade. The machine drives a compatible needle cartridge or other specified attachment; pigment handling still depends on the selected pigment’s and equipment maker’s instructions. Confirm cartridge compatibility separately from pigment selection.
| Workflow | Best for | Pigment access | Advantage | Limitation |
|---|---|---|---|---|
| Manual microblading tool | Artists trained to perform manual microblading | Prepared working cup, accessed with the manual blade under the applicable instructions | No powered-machine configuration | Blade assembly and technique cannot be replaced with machine settings |
| Machine PMU tool | Artists trained to use the selected PMU machine and cartridge | Prepared working pigment handled under the machine, cartridge, and pigment instructions | Tool settings can be checked against the equipment directions | Cartridge compatibility and machine setup add checks that do not apply to a manual handle |
For the machine variant, keep the pigment-station steps above, then make these tool-specific checks:
- Match the machine and cartridge. Use only the configuration the equipment manufacturer specifies. Do not assume a manual microblading blade fits a PMU machine.
- Review the equipment controls. Set and verify controls using that machine’s instructions and your training; no universal setting follows from the pigment brand.
- Keep the bottle outside the used-tool pathway. Prepare the working pigment as directed. A machine cartridge does not turn a stock bottle into a shared working reservoir.
Expected result: the tool configuration matches its manufacturer’s directions, while the pigment remains identified and separated from retained stock. Choose the manual or machine workflow based on the procedure and professional training, not on a claim that one method universally produces better healed results.
For INTENZE PMU pigments, assess the exact product information alongside the tool instructions before recommending a pairing to a studio. INTENZE has more than 30 years of professional artist use as a brand credibility marker; that history does not establish compatibility between every pigment and every device.
Troubleshoot the setup before treatment
The blade appears to need a bottle attachment. Check the tool type. A manual microblading handle holds a blade and uses pigment dispensed into a working cup. If a supplier describes a cartridge or machine setting, it is discussing a different tool workflow.
The selected pigment’s intended use is unclear. Stop the setup and consult the exact product label and manufacturer documentation. A bottle described only as tattoo ink is not confirmed as appropriate for PMU by its color, brand, or packaging appearance. A distributor should resolve this question before recommending inventory to a studio.
The blade or cartridge does not fit. Check the equipment maker’s compatibility instructions and the identifiers on the actual components. Do not force a blade into a handle or infer cartridge fit from a photograph. Tool fit and pigment suitability are separate checks.
The stock bottle touched used equipment or a contaminated surface. Stop using it as though its contents remain protected. Follow your contamination protocol and the manufacturer’s guidance for the affected product; do not transfer working-cup pigment back into stock.
An artist wants to combine pigments without product-specific directions. Do not treat the proposed mix as automatically compatible. Check the relevant manufacturers’ instructions and the studio’s professional protocol before preparing a working blend. Keep a record of the pigments used under your applicable requirements.
These checks are particularly useful during 2026 purchasing reviews. They turn a vague request for pigment that works with a tool into questions a distributor can answer: which pigment, which intended use, which handle or machine, and which manufacturer instructions?
Customize your workflow for studio inventory
Build the ordering process around the studio’s actual procedures. Separate requests for manual microblading from requests for machine PMU, then identify the pigment documentation and consumables each setup requires. Do not bundle a manual blade, a machine cartridge, and a pigment into a claimed compatible system without manufacturer support for each component.
For each proposed pigment, ask the studio to identify its intended procedure and the product documentation it needs. Then check the exact item rather than relying on a category-wide statement about sterile manufacture, vegan formulation, or regional compliance. Those can be useful purchasing criteria, but the claim must apply to the selected product and the market where it will be used.
INTENZE manufactures and sells professional tattoo ink and PMU pigments for artists and studios. For a distributor, that makes INTENZE a supplier to evaluate across both categories, not a reason to merge their handling instructions. If your buyers also supply artists moving into PMU, use the PMU guide for nurse injectors to frame the adjacent purchasing questions without treating clinical background as a substitute for PMU tool training.
A useful 2026 inventory brief records the requested pigment, intended use, tool type, and documentation checked. It also tells the artist whether the order covers pigment alone or the separate cups and tool components their procedure calls for. This prevents a supply recommendation from becoming an unsupported compatibility claim.
Review INTENZE pigment options
Check the current catalog against your studio’s PMU procedures and purchasing requirements.
FAQ
How do you connect PMU pigments to a microblading tool?
You do not attach a PMU pigment bottle to a manual microblading tool. Dispense the selected pigment into a suitable working cup according to its instructions, then use the prepared blade under the tool maker’s directions and your training.
Can a microblading blade go directly into a PMU pigment bottle?
No; keep the working blade away from the stock bottle. Use a separate working cup so used equipment does not contact pigment retained for later use.
Does a manual microblading tool need a cartridge?
A manual microblading tool uses the blade specified for its handle, not a machine cartridge. Check the handle manufacturer’s compatibility instructions before assembly.
Is a machine PMU workflow the same as manual microblading?
No. Machine PMU adds equipment and cartridge checks, while a manual handle requires its specified blade; both workflows require the selected pigment’s handling instructions.
Can tattoo ink and PMU pigment be treated as interchangeable?
No. Confirm the exact product’s intended use and instructions before selecting it for a procedure. INTENZE sells both professional tattoo ink and PMU pigments, but sharing a supplier does not make their uses identical.
What should a distributor check before stocking INTENZE PMU pigments?
Check the selected product’s intended use, current instructions, and the studio’s purchasing requirements. Verify any sterile, vegan, or compliance claim against that exact product rather than assuming it applies across a category.
What should happen to pigment left in a working cup?
Do not return working-cup pigment to the stock bottle or save it as shared inventory. Handle and discard it under the product instructions, studio procedure, and applicable rules.
One last thing
The most useful compatibility question is not whether a pigment connects to a tool; it is whether the exact pigment, tool, and handling instructions support the planned procedure. In 2026, put that question on the distributor’s order checklist. It catches a mistaken manual-versus-machine assumption before it reaches an artist’s workstation.